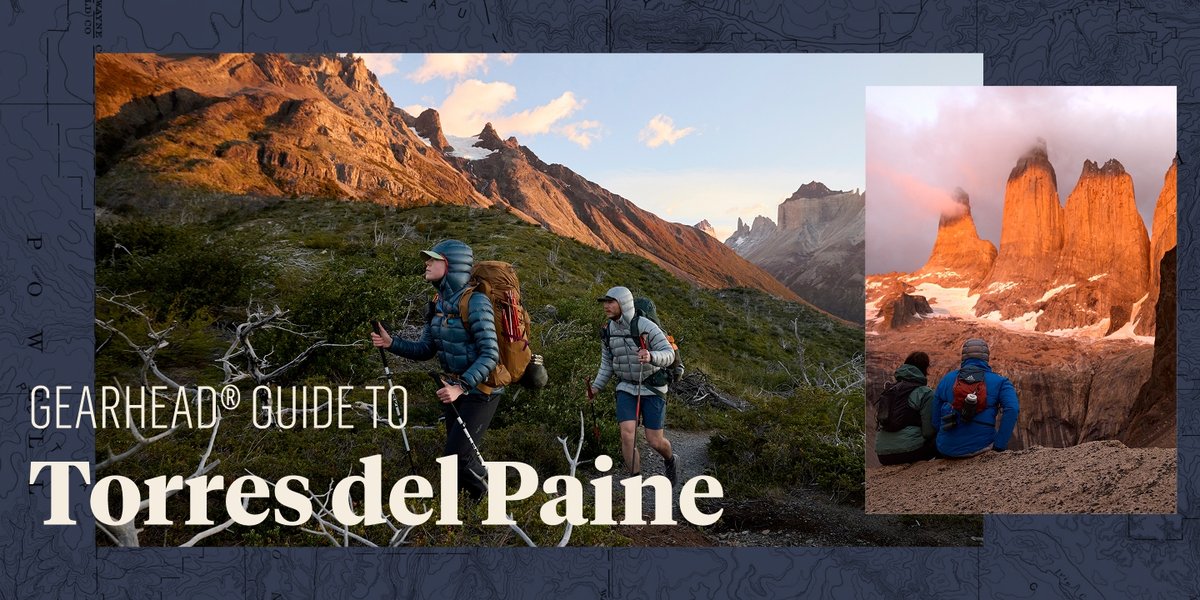
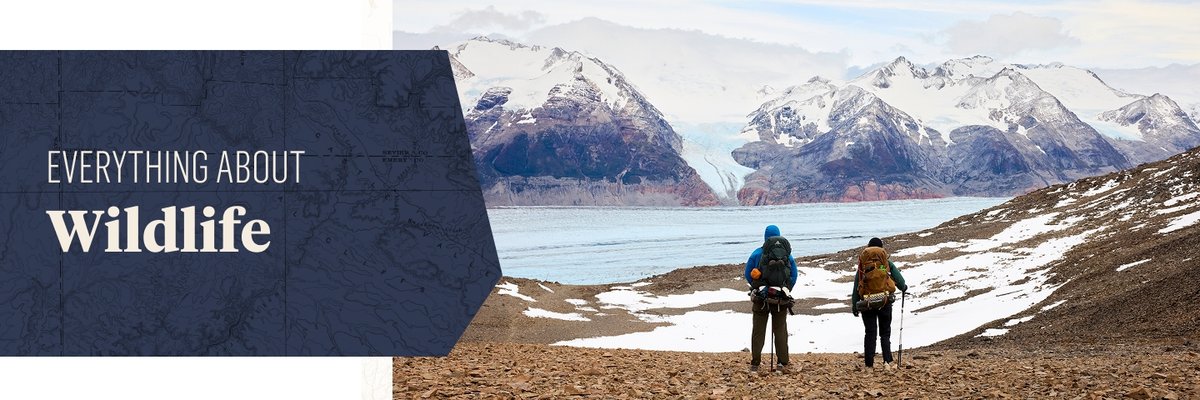
How To Hike The O-Trek In Chilean Patagonia
A Gearhead® Guide To Backpacking Torres del Paine
Are you interested in hiking the O-Trek? Well, if not—you probably should be. This 73-mile (or is it 85-mile?), week-long backpacking route in Torres del Paine National Park is a portal to Chilean Patagonia’s most pristine wilderness. I traveled to the park to complete the O-Trek in March of 2025 along with fellow Backcountry Gearheads® to test gear and share this comprehensive guide to the route.
In this guide, you’ll learn it all: from navigating international flights and surviving the Santiago airport in a jetlagged daze, to dialing in your pack with the right layers, fuel, and footwear. You’ll get a real-world breakdown of each day’s section on the O—trail insights, refugio scoop, unexpected wildlife run-ins, and moments that’ll stop you cold just staring at the sky. We’ll also hit the town vibes in Puerto Natales and wrap it all up with a few can’t-miss detours in Santiago. Whether you're chasing condors, packing ultralight, or just need to know which bus not to miss, this guide’s built for trekkers who want the real deal—not just the glossy Instagram version. Let’s get into it.
Gearhead® Tip: A refugio is the local name for the established camps along the route. I’ll refer to individual camps by their name (Paine Grande, for example). This is one of the mentioned refugios—it’s important to understand that camps and refugios are basically intercheable terms throughout the article.
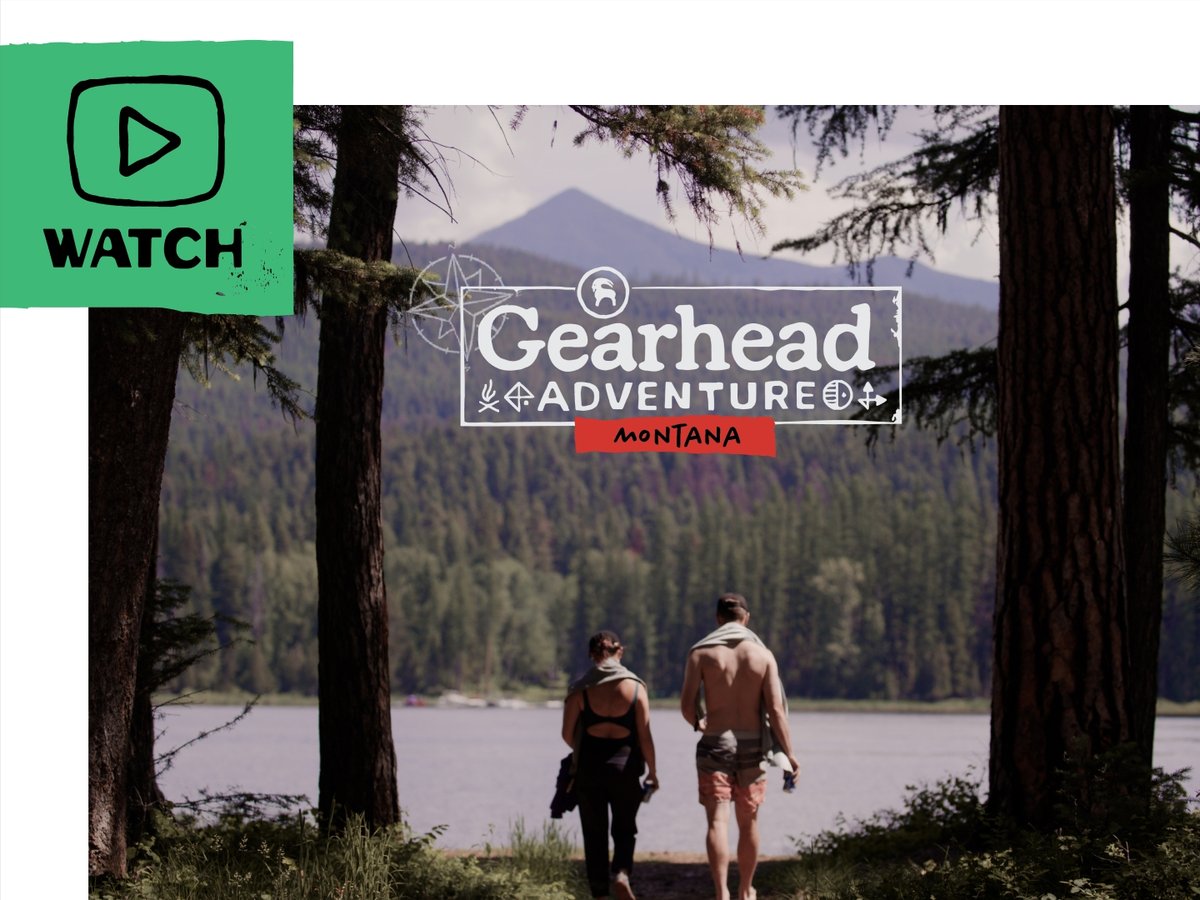
Watch The Action In Our Gearhead® Adventure Video!
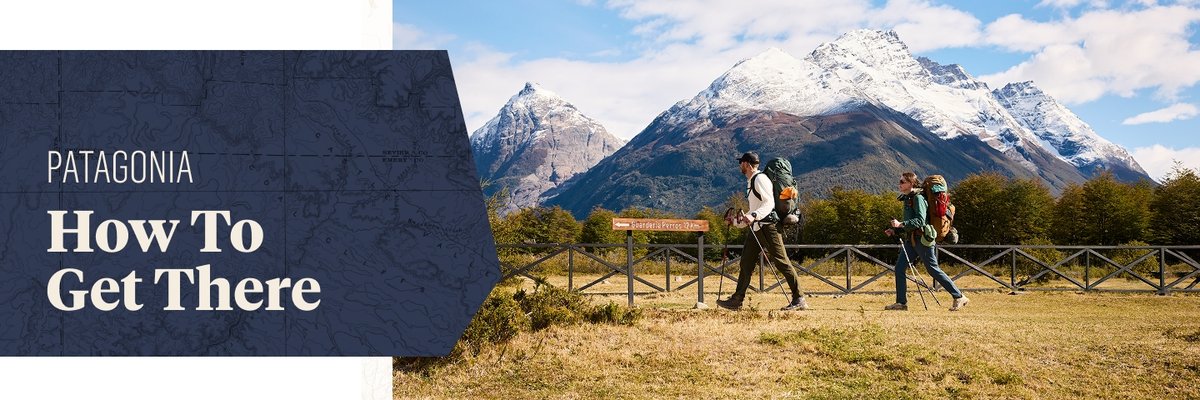
Getting to Torres del Paine isn’t exactly a straight shot—this place earns its remoteness. And honestly, that’s part of the magic. First things first: you’ll fly into Santiago, which is likely where your patience will start getting a workout. It’s a big, busy hub that feels like it knows it’s the gateway to something spectacular. From there, you’ve got two main options to reach the park—and trust me, both come with trade-offs.
The most direct route? Fly from Santiago (SCL) to Puerto Natales (PNT). Sounds easy, right? And it is… if you can land a flight. These routes are seasonal and limited, often operating just a few times a week in high season (roughly November to March). They fill up fast, so if you’re chasing this route, book it early.
Like—right-after-you-buy-your-hiking-boots early.
Now, what we actually did (and what many others end up doing): we flew from Santiago to Punta Arenas (PUQ), with a quick stop at Puerto Montt (be sure to stay on the plane if you have this connection). This route is way more reliable, with daily flights and flexible times. The catch? It’s a long haul from there—roughly three hours by bus north to Puerto Natales. The good news? It’s super easy to book the bus ahead of time with Bus Sur, and it goes straight from the Punta Arenas airport to Puerto Natales. But hey, it’s not a bad ride. You’ll pass vast pampas, wind-blasted ranches, and possibly even spot a guanaco or two doing their aloof Andean thing out the window. Never heard of a guanaco? Read along to the wildlife section of this article!
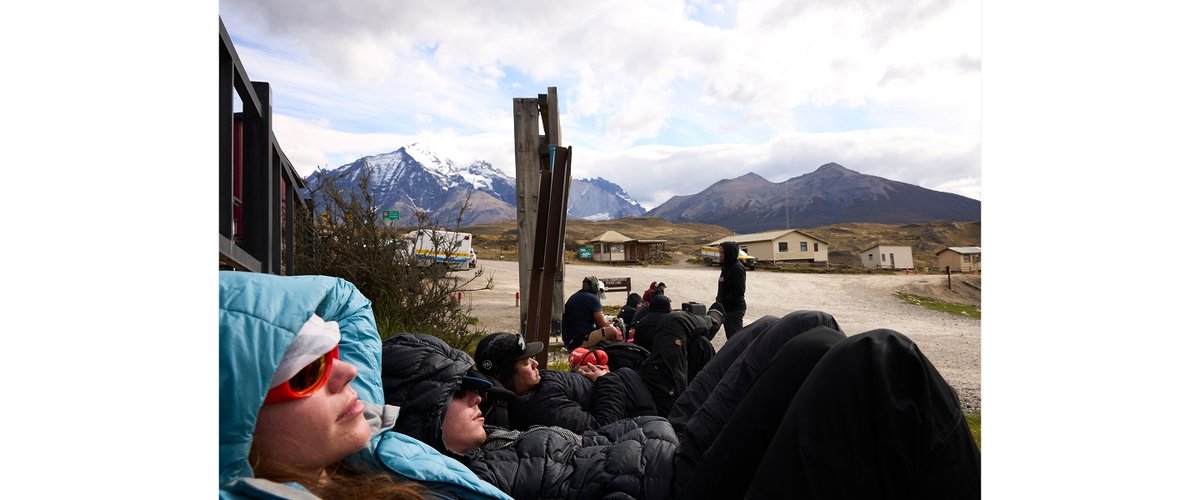
Once you roll into Puerto Natales, you'll either crash for the night (recommended if your brain’s still rebooting from travel), or you can hustle straight onto a bus bound for the Torres del Paine park entrance. We recommend hanging out for at least a night to make sure all of your luggage makes it before it’s time to hit the trail. If you do stick around, there’s plenty to do in Puerto Natales (check out the Locales section of the article) and Ubers are readily available. When you are ready to head to the park, most hotels allow you to store your luggage while you trek, which we highly recommend. The buses to the park are timed around access hours and refugio check-ins, but they can fill up fast. You’re gonna want to reserve ahead—especially in peak season. Most of them stop at key landmarks like Laguna Amarga and Pudeto, depending on where you're starting your hike.
Quick disclaimer: the whole transit flow—especially involving multiple buses—runs on a kind of Patagonia time. Delays happen. Buses leave early. Or late. Or from around the corner instead of the official terminal. Be flexible. Keep some Chilean pesos handy. And maybe don’t trust a tight connection too much. The reward is worth the wrangling. This is the edge of the world—and getting there should feel like it.
Gearhead® Approved Luggage
From our partners at Big Agnes
Big Agnes
Causeway 28L Backpack
2 colors
Backcountry
All Around 40L Duffel
3 colors
Backcountry
All Around 60L Duffel
5 colors
Backcountry
All Around 105L Duffel
3 colors
Big Agnes
Big Joe Gear 100L Duffel Bag
1 color
Big Agnes
Big Joe Gear 50L Duffel Bag
2 colors
Big Agnes
Bucket 23L Tote
2 colors
Big Agnes
Bucket 50L Tote
2 colors
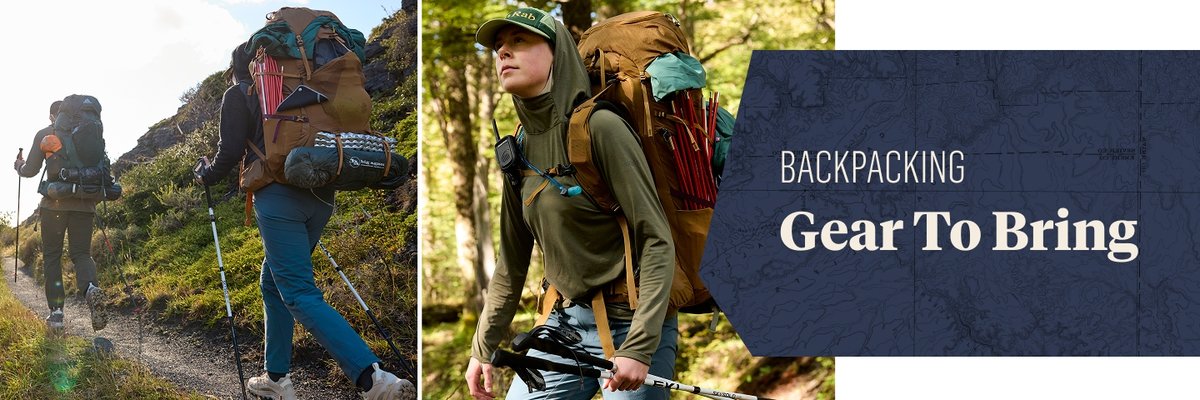
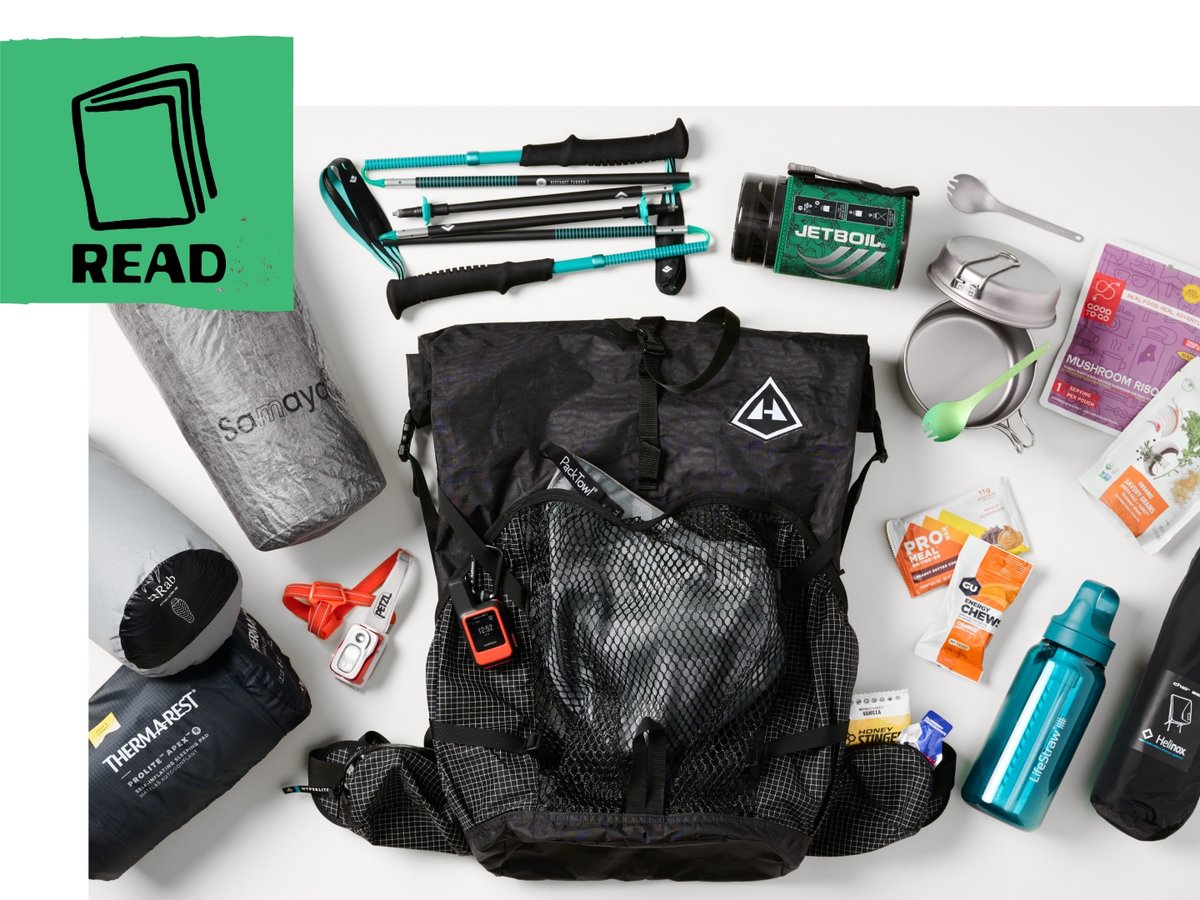
Before we dive into the gear specifics, if you're the type who likes to double-check their packing list (or obsess over it for weeks like some of us…), definitely hit our Backpacking Checklist article—it covers all the essentials, down to the tiny but crucial things like repair tape and spare lighters. It’s a lifesaver, especially if you’re staring at your gear pile wondering what makes the cut for Patagonia.
Now, let’s talk weather. We hiked the O in the fall—shoulder season. That means fewer crowds, fiery lenga forests, and a forecast that swings harder than a windblown tent flap. Expect wild variability: one minute you’re sweating under the sun, the next you’re stuffing your hands deep into your pockets as sideways rain rolls in. Layers are non-negotiable. Start with a moisture-wicking baselayer (merino or synthetic, your call), toss in a midweight fleece for warmth, and don’t even think about skipping a good rain/wind shell. A puffy jacket is your best trail buddy when the temps drop, especially around camp, and gloves plus a beanie or buff will save your fingers and ears on frosty mornings.
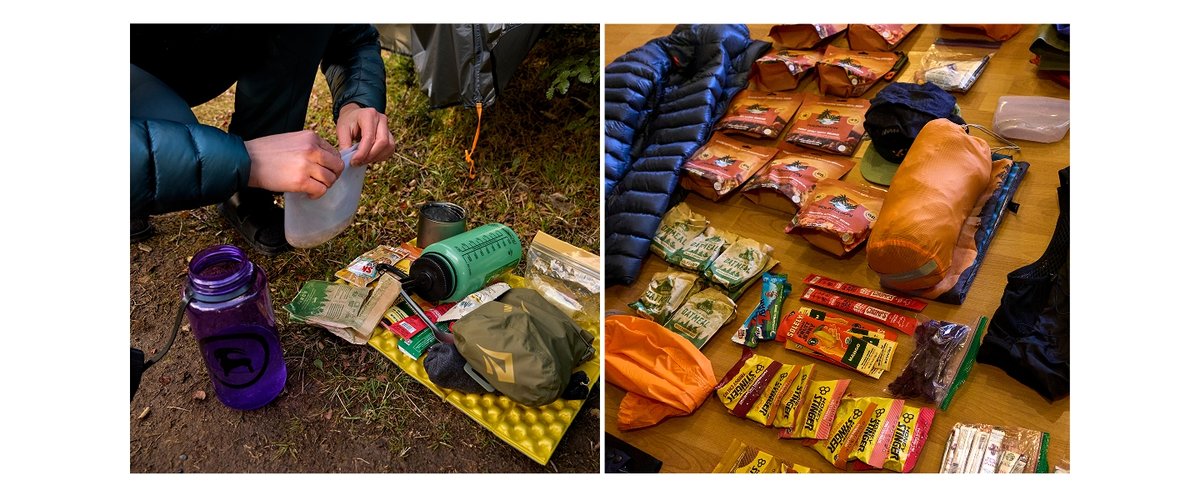
You may want or need to bring some cookware and food depending on your refugio reservations. We recommend a metal spork, compact stove, and freeze-dried meals as a starting point, along with plenty of snacks. Skip ahead to the refugio section of this article to learn about cooking fuel availability on the trail! You can easily buy fuel in Puerto Natales as well—remember you cannot fly with it.
Your sleep system will vary depending on your refugio reservations —and we’ll get deep into that later on in the trip report. Just know now: plan for cold nights, and don’t underestimate the chill that rolls in once the sun dips behind those jagged peaks. We recommend a sleeping bag in the 15-25°F range. And if your refugio reservations justify your own sleep system—bring a tent that does well in the wind. I carried a tent footprint the whole route but didn’t end up using it.
Last but certainly not least, it’s important to carry the basics for safety. We recommend some kind of satellite communication device as there is no service out on the trail—I carry a Garmin In Reach Mini 2 whenever I’m in remote backcountry wilderness. A med kit is also an absolute must-have and I ended up deploying mine on multiple occasions over the course of our trip. Adventure Medical has a ton of options so that you can find your perfect balance between preparedness and weight savings.
Footwear Matters. A Lot.
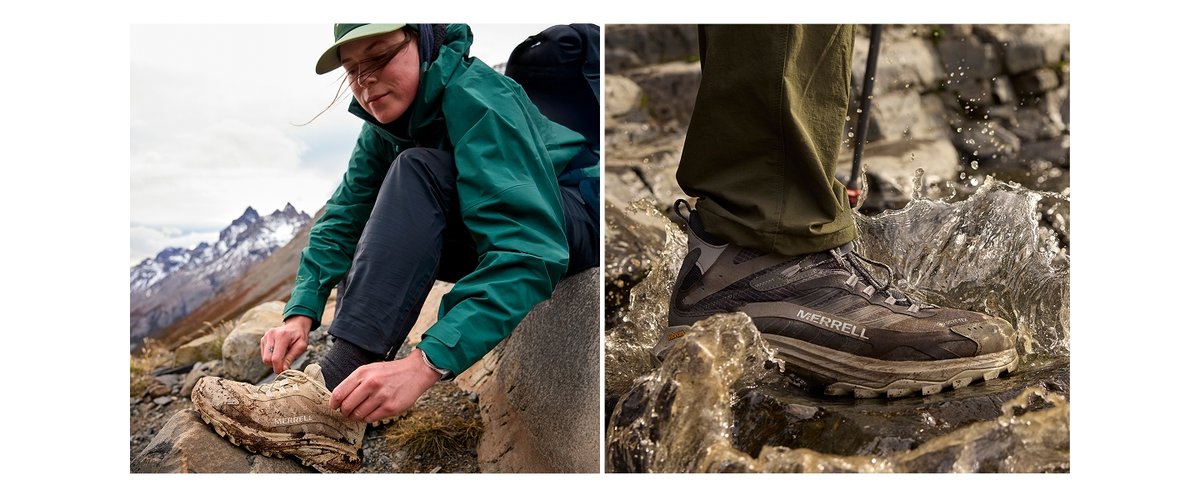
This deserves its own moment. The O-Trek is long, rugged, and often wet. There are bogs. There are ankle-deep stream crossings. There are muddy descents that will absolutely test your balance and patience. If you’re still debating trail runners versus boots, here’s my take: go waterproof, go mid-height, and go tested.
I wore the Merrell Moab Speed 2 Mid GTX boots the whole way and they were absolute workhorses. Lightweight but supportive, with a breathable yet fully waterproof membrane that handled everything from knee-high grasses soaked with condensation to glacier-fed river splash zones. Plus, the grip on wet rocks? Surprisingly confidence-boosting. I saw plenty of soaked socks and regret from folks in more minimal footwear—don’t be that hiker wringing out their insoles on day two.
Bottom line: gear up for weather that can’t make up its mind, and footwear that keeps you moving no matter how sloppy the trail gets.
Gearhead® Approved Footwear
From our partners at Merrell
Merrell
Moab Speed 2 Mid GTX Hiking Shoe - Men's
3 colors
Merrell
Moab Speed 2 GTX Hiking Shoe - Women's
1 color
Merrell
Moab Speed 2 GTX Hiking Shoe - Men's
2 colors
Merrell
Moab Speed 2 Mid GTX Hiking Boot - Women's
2 colors
Merrell
Moab Speed 2 Mid GTX Hiking Boot - Women's
1 color
Before we get into the nitty-gritty of each trail day, here’s something essential that often catches hikers off-guard: you can only cook at designated refugios—and only within the designated cooking areas. That’s not just a guideline, it’s enforced. This means you’ll want to plan your meals carefully. Some days, you’ll pass through a refugio for a mid-day sandwich or a chance to cook your own food. Other days? Not so much—there may not be a refugio to stop at.
So pack a few no-cook lunch options—things like canned fish, high-calorie bars, nuts, and dried fruit.
Cold calories are better than no calories.
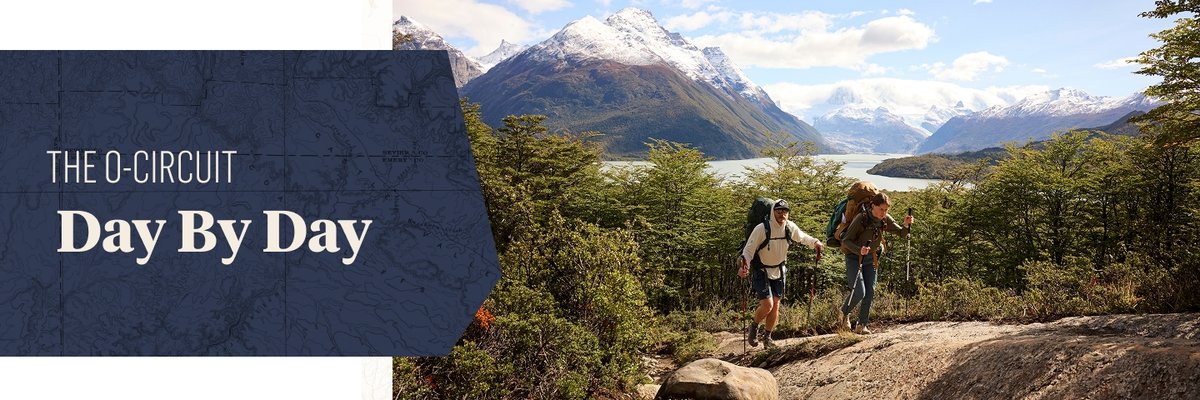
Oh, and another thing. Take every mileage sign with a grain of salt. Our group clocked almost every section at least 1-2 miles longer than the posted distance, according to our watches. As far as elevation gain goes—those are underestimated as well according to the signage. By the third day, we all agreed that everything takes an hour longer than it should. Be sure to take this into account! Now, let’s map out the trek—our trek—the one
we actually did, day by day.
Day 1: Camp Central to Camp Seron
Distance: ~8.7 miles
Elevation Gain: ~1,150 ft
You’ll start this adventure from Camp Central, right at the park entrance—buzzing with anticipation and, usually, a crowd of hikers adjusting their trekking poles or second-guessing their pack weight. The trail begins open and relatively flat, winding through grassy steppe and low rolling hills. As you head toward Camp Seron, the views begin to stretch—valley walls unfolding around you, and if you’re lucky, the wind stays tame. Keep an eye out for condors overhead and herds of guanacos grazing in the distance. It’s a mellow warm-up day, ideal for easing into trail rhythm. Keep in mind that you’ll be on the backside of the park for the next few days, which is more remote and has fewer accommodations in the refugios. Once you make it to the start of the W-trek at camp Grey, you’ll be able to rely more on the refugios for food and comforts.
Day 2: Camp Seron to Camp Dickson
Distance: ~11.8 miles
Elevation Gain: ~1,250 ft
This is where the scenery kicks up a notch. You’ll cross undulating terrain and navigate some exposed sections as you trace the Rio Paine valley. Weather shifts fast here—expect sun one hour, sideways drizzle the next. The highlight is your arrival at Camp Dickson, perched on a ridge overlooking a shimmering lake with glacier-carved peaks standing sentinel in the distance. It’s postcard-perfect. There’s a good chance you’ll spot hawks, maybe even a fox darting across the trail near camp. It’s one of the most atmospheric places to spend a night on the O.
Day 3: Camp Dickson to Camp Los Perros
Distance: ~7.5 miles
Elevation Gain: ~1,300 ft
A quieter, moodier day. This section winds almost entirely through dense, enchanted-feeling Patagonian forest—you’re under tree cover nearly the whole time. The trail climbs steadily, often slick with mud, weaving past moss-draped lenga trees and trickling creeks. It feels remote. You’ll pass Laguna Los Perros, a silty blue lake with a massive glacier feeding it from across the bowl. Wildlife feels closer here—keep an ear out for woodpeckers hammering the trees and rustles from things you won’t quite see.
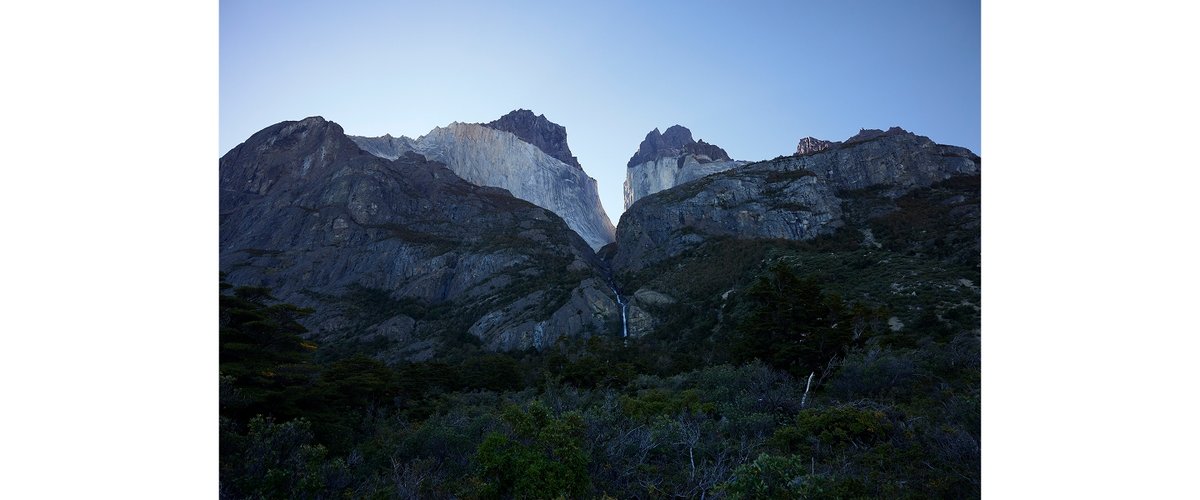
Day 4: Camp Los Perros to Camp Grey
Distance: ~10 miles
Elevation Gain: ~1,800 ft
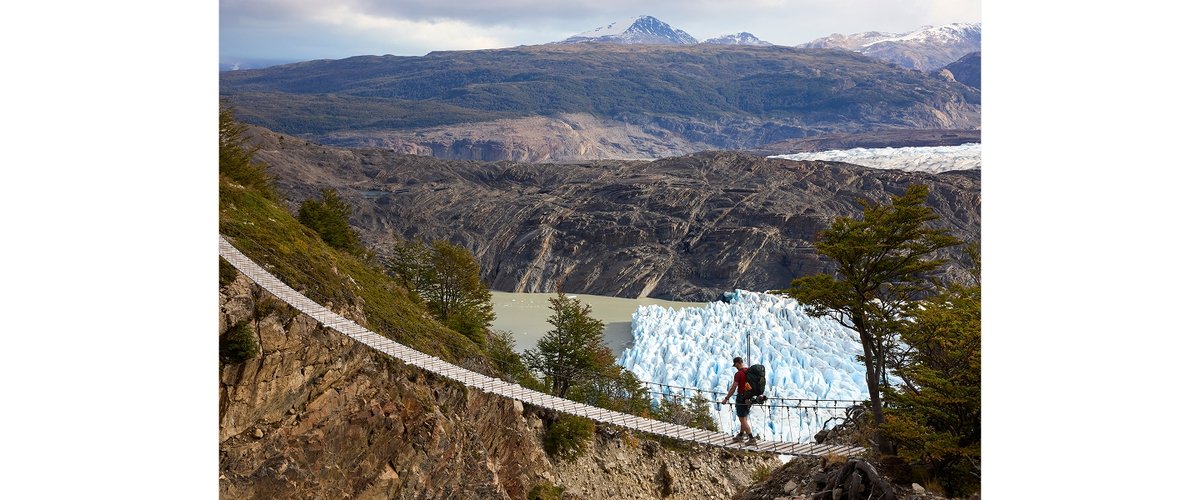
The big one. This is the most demanding—and arguably the most rewarding—day of the whole trek. You’ll climb steadily to the John Gardner Pass, the highest point on the O. The wind here can feel unhinged, like it’s trying to lift you off your feet. But the view? Unreal. The massive Grey Glacier stretches out below like a cracked sea of blue glass.
From there, the going is all downhill—but that may not necessarily be a good thing. Regarded by many as the most strenuous stretch of terrain on the whole trek, this descent carries on seemingly forever, and involves very steep and slick terrain, especially in rain.
The good news? Lunch! You’ll pass the Camp Paso refugio—great for a hot lunch break (and drying your socks). The final stretch toward Camp Grey is exposed, with swinging suspension bridges and panoramic glacier views chasing you downhill. Camp Grey marks the beginning of the W-trek, which will have more hikers and more developed refugios.
Day 5: Camp Grey to Camp Paine Grande
Distance: ~6.8 miles
Elevation Gain: ~800 ft
A recovery day, but don’t let your guard down—it’s still a wild, gorgeous stretch. You’ll hike along the lake, with wind funneling through the terrain like it’s got somewhere urgent to be. Look for floating icebergs bobbing off the glacier’s face. You’ll pass high cliffs and rocky viewpoints perfect for long snack breaks. Camp Paine Grande is a larger, more developed spot with a buzzing social vibe—good for chatting with other trekkers and nursing sore legs—not to mention many comforts of society, which we’ll cover in the next section.
Day 6: Camp Paine Grande to Camp Los Cuernos
Distance: ~12 miles
Elevation Gain: ~1,500 ft
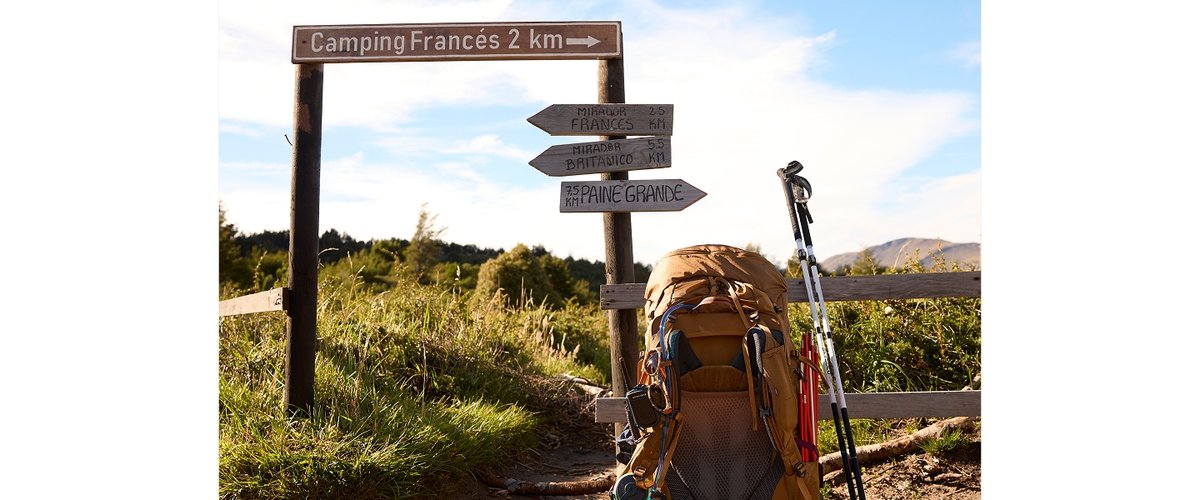
Long but incredibly rewarding. You’ll pass through the French Valley, and there’s a side trip you must take. Drop your heavy pack at Camp Italiano, grab some snacks, and hustle light up to Mirador Británico—easily one of the most stunning views in the park. Jagged granite spires jut up around you like the broken teeth of giants. After soaking that in, grab your pack from Italiano but don’t eat lunch yet! You’ll descend back down and stop for lunch at Camp Francés where you’ll be rewarded with hot sandwiches and coffee available for purchase. Then, you’ll carry on towards Los Cuernos, where the terrain mellows into rolling hills and lake-hugging paths. Keep your eye out for lake access—you can stroll on the lake shore at a few designated spots. Swimming is not allowed anywhere inside the park.
Day 7: Camp Los Cuernos to Camp Central
Distance: ~8.4 miles
Elevation Gain: ~1,200 ft
Don’t let this final full trail day sneak by without savoring it—this is prime guanaco and puma country. Keep your voice low and your camera ready, especially in the early morning hours. The trail cuts through open plains with wide views and dramatic skies. There’s something deeply grounding about this stretch—maybe it’s the animals, maybe it’s the growing awareness that the loop is nearly complete. You’ll end the day back at Camp Central, sore and proud and probably craving a refugio meal and a pisco sour. Use this as a recovery day—tomorrow is another big one.
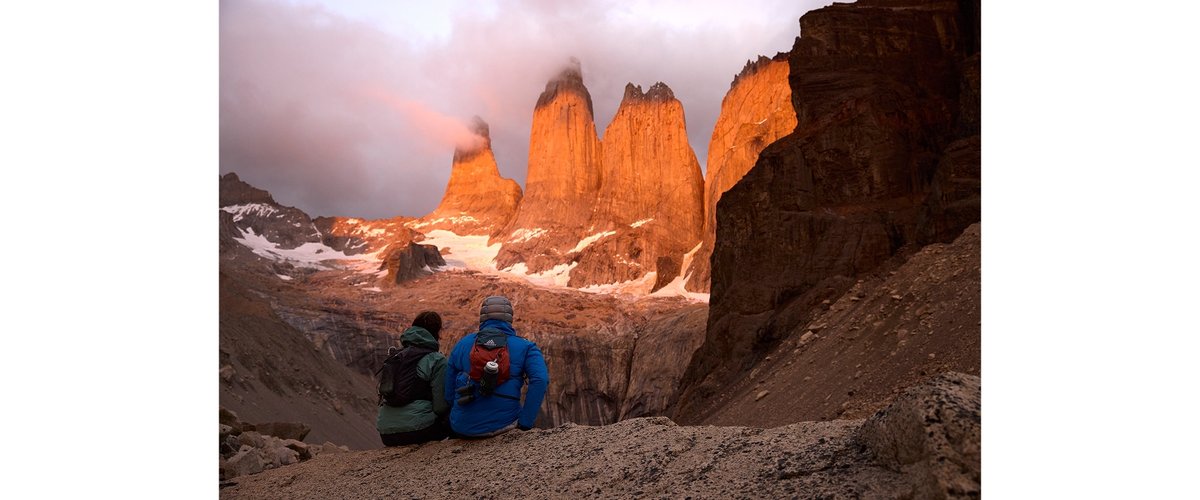
Day 8: Out-and-Back to Torres del Paine Lookout
Distance: ~11 miles round trip
Elevation Gain: ~2,800 ft
Technically you’re already at the end of the loop, but you absolutely must wake up early to make it to the park’s namesake. The day hike to the famous Torres lookout (Las Torres) is the crown jewel finale. It’s a steep climb—especially that last kilometer of rock and boulder scrambling—but the payoff? The iconic three towers rising out of the earth like stone deities, mirrored in a glacial lake. It’s early to rise and late to finish, but there’s no better way to end the trek than standing at the very place that made you dream of Patagonia in the first place.
Gearhead® Tip: According to park rules you cannot start the hike to the towers after 1pm. You wouldn’t want to anyways—the trail is absolutely packed by 9am. We started hiking at 3AM and it was totally worth it because we didn’t run into any crowds on the trail until we were an hour into our descent from the top.
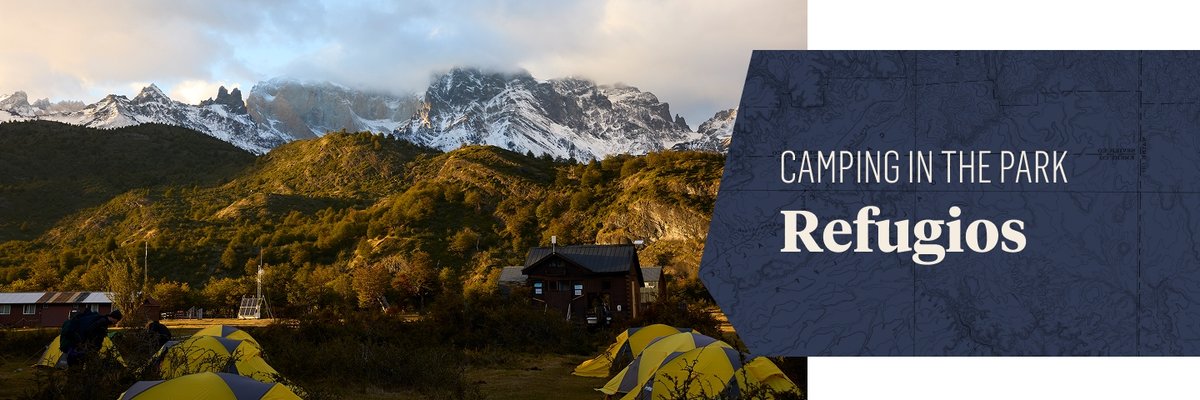
So, What’s A Refugio?
Let’s talk refugios—because out here, they’re not just places to crash. They’re lifelines, hubs of warmth, food, safety, and human connection in the middle of some of the wildest terrain on the planet. Whether you're carrying everything on your back or just a backpack full of snacks and dry socks, you must stay at a designated refugio every night on the O-Trek. Wild camping isn’t allowed. And yes, reservations are mandatory—no exceptions.
The reservation system can be a bit of a maze, especially if you're piecing together your trek across different providers. The key players are Vertice Patagonia and Fantastico Sur, depending on which campsites you're booking. Our saving grace was Torres Hike—we booked every refugio reservation and provided meal on their website and it was a smooth experience. You can either reserve to stay in a pre-pitched tent—complete with sleeping pads and bags—or bring your own tent and pay for a spot. In both cases, you're locked into a specific camp each night, which means your itinerary needs to be planned and booked well in advance (especially in peak season, when spots vanish faster than trail mix at mile seven).
The Backside: Rugged, Simple, and Still Essential
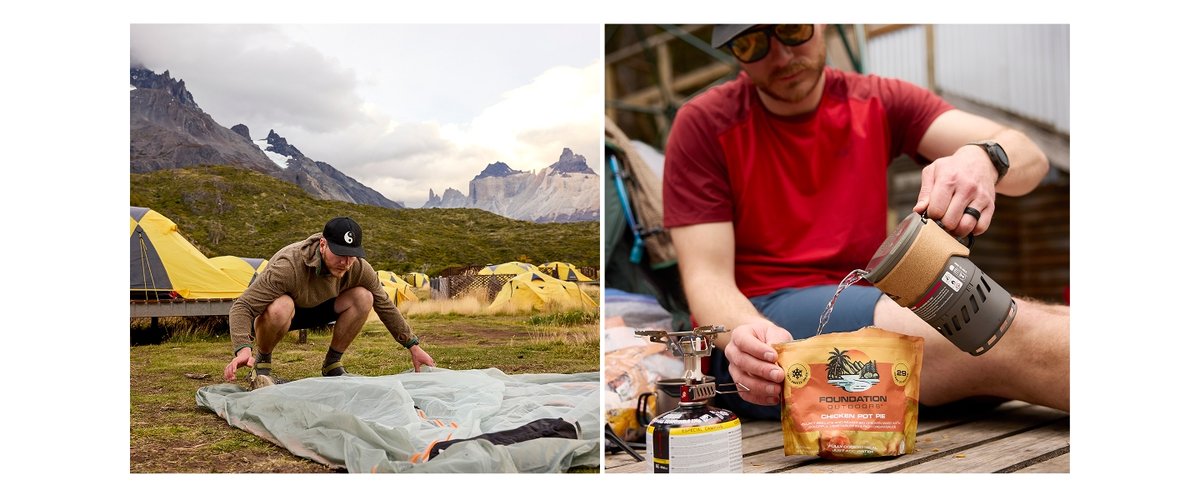
Starting off on the backside, camps Serón, Dickson, Los Perros, Paso are rustic, but they still provide critical services and resources. Meals must be reserved ahead of time. No restaurants, no à la carte menus—just hearty, simple food that tastes like a feast after 10 miles of mud.
It’s very popular for thru-hikers to carry and cook their own food while hiking through these camps. We utilized cookware from MSR to whip up our favorite freeze-dried meals, and experienced backpacking in its intended form.
Despite the remote feel of these camps, you can still pay to use Wifi at all of these camps. That being said, our Garmin In-Reach devices worked very well at these camps which saved us the cost.
The W-Trek Refugios: Creature Comforts & Then Some
Along the front half of the loop—Camp Grey, Paine Grande, Los Cuernos, and Central—the refugios are pretty plush by backcountry standards. Think: actual restaurants, hot meals you can prepay for or purchase on site, and a full bar stocked with Chile’s signature take on brandy—Pisco. You can reserve full board (breakfast, boxed lunch, and dinner), or cherry-pick meals depending on your vibe and budget.
As you might expect, Wifi is readily available for purchase at these refugios, and you just might need to use it even if you have a satellite device. Because these camps are quite a bit more crowded, our devices had a hard time sending and receiving messages. Luckily, a quick walk to the outskirts of camp near the tents provides an improved signal to communicate with the outside world without a hitch.
Cooking Zones, Water Access & Trail Wisdom
If you're self-catering, you can only cook in the designated cooking areas at each refugio. These are sheltered structures, usually with picnic tables, and many have running water, dishwashing sinks, and drying racks for your well-used cookware.
Gearhead® Tip: there's often a stash of partially used gas canisters in the communal gear bins—left behind by generous (or overpacked) hikers. Always test before trusting, but they can be clutch when your fuel runs low.
Bathrooms, Showers, and Store Runs
Refugios also come with shared bathrooms and most offer showers—some hot, some scalding, some ice-cold character builders. Bring sandals. There are also small convenience stores at many refugios where you can buy snacks, drinks, and basics (though prices are understandably steep, and selection varies wildly). Forgot your sunscreen? Need some canned tuna? There’s a decent chance you’ll find a fix.
Refugio Staff: Respect and Gratitude Go a Long Way
One last thing—and it’s important. The refugio staff are more than just hosts. They keep track of who's on the trail, make sure nobody goes missing, and are often the first line of help in an emergency. Be kind. Be cooperative. Be patient. This place runs on a delicate balance of human effort and raw wilderness, and you’re lucky to be out in it. Treat the system (and the people who make it run) with the respect it deserves.
At the end of the day—refugios aren’t just where you sleep. They're part of the experience. Part of the story. And very often, part of the reason you’ll want to come back.
On that note, there are some key rules to follow in the park. As we’ve covered, it’s important to observe the signage and only cook in designated cooking areas, all of which can only be found at refugios. There is also no swimming allowed in the park, and hiking on glaciers is only allowed in designated areas specified by signage and trail maps. It’s also required to sign into refugios when you’re staying for the night. This helps verify your reservation and helps park staff keep track of who’s safely arrived at camp for the night.
MSR Camp Cookware
The gear that kept us fueled
MSR
Switch System Stove
1 color
MSR
Titan Cup Double Wall
1 color
MSR
Titan Long Spoon
1 color
MSR
Titan Cup
1 color
Ever Herd Of Guanaco? Wildlife Warning!
The Creatures Of Torres del Paine
Out here, you're not just hiking through Patagonia—you’re walking through someone else’s living room. Torres del Paine is very alive, and the longer you're out on the trail, the more that becomes undeniable. You’ll hear it in the rustling brush, catch it in the glint of a distant eye, feel it in the stillness just before a creature steps into view. The wildlife here isn’t ornamental. It’s part of the story. Sometimes even the headline.
Let’s start skyward—because Andean condors are the kind of creatures that stop you in your tracks. With wingspans brushing 10 feet and the quiet grace of a glider, they tend to circle high above the valleys and cliffs. You’ll have the best chance of spotting them near John Gardner Pass or above the wide open stretches between Camp Serón and Dickson, especially in the early morning thermals. If one swoops low, just stop. Watch. It’s like witnessing flight as it was meant to be—ancient and slow and effortless. We had a condor soaring in the breeze 100ft above us just before we made it to Camp Italiano on day 6.
Then there’s the big one. The elusive one. The puma. Yes, they’re here. And yes, they are occasionally seen. The best shot you’ll have? That final stretch between Camp Los Cuernos and Camp Central, where the terrain opens up into prime guanaco grazing country—and guanacos are basically Patagonia’s version of an all-you-can-eat buffet for pumas. Early morning and late dusk are your golden windows. Stay quiet. Move softly. Look for signs: scat, tracks, even the eerie stillness that suggests you’re being watched (because you probably are).
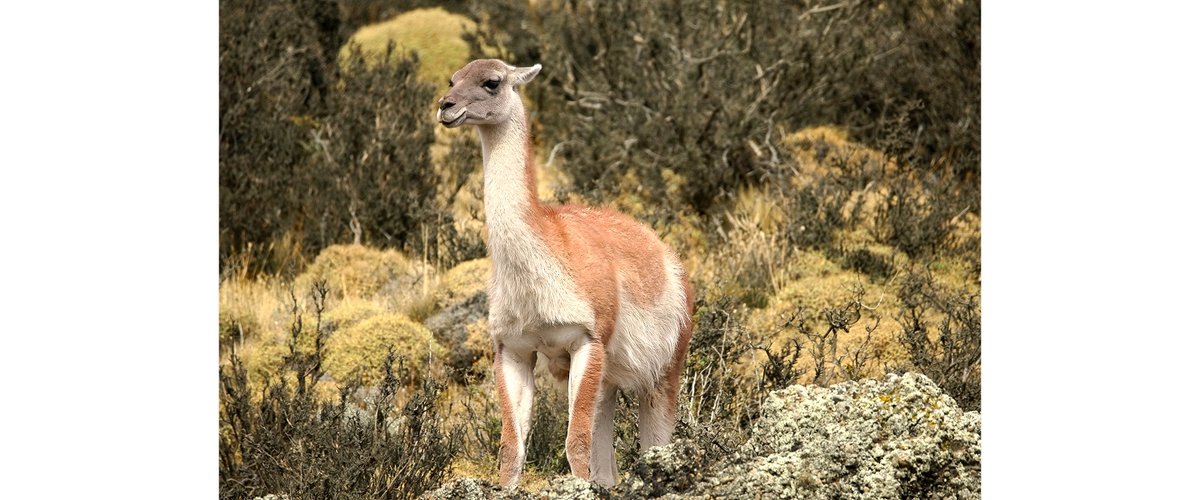
Speaking of guanacos, they’re everywhere—but they never get old. These wild cousins of the llama are elegant, expressive, and oddly serene. You’ll see them standing like sentinels on hillsides, especially near the park’s eastern entrance, but don’t be surprised if you round a bend and find one chewing thoughtfully right next to the trail. They’re photogenic in that “I was born majestic” kind of way.
Then there’s huemul deer, one of Chile’s most endangered species. They’re incredibly shy and not easy to spot, but your best odds are in the more remote and forested zones—think between Dickson and Los Perros, where the human presence fades and the landscape feels older, quieter. Catching a glimpse of one feels like being let in on a secret.
And don’t sleep on the smaller stuff. Foxes, armadillos, Magellanic woodpeckers with their crimson heads tapping away in the lenga trees… Even the sounds are part of the experience: the haunting call of the caracara, the distant splash of something slipping into water, the echo of hoofbeats on hard ground.
So keep your eyes open. Not just for the big, dramatic wildlife moments—but for the subtle, serendipitous ones, too. Out here, the more present you are, the more the park reveals itself. And sometimes, it's not the mountains that make your breath catch—it’s the quiet flick of a tail in the brush.
What To Do Outside Of The Park
The O-Trek might be the main event, but once you step off the trail, the adventure’s not over. In fact, swapping your muddy boots for street shoes opens up a whole different side of Chile—one with smoky kitchens, moody harbors, bustling markets, and a proper cocktail scene. Whether you’re decompressing after the trek or stalling before re-entry into real life, here’s where to go and what to do in the key hubs along your route.
Puerto Natales: The Trailhead Town
This little port town punches way above its weight. Wedged between jagged peaks and the Seno Última Esperanza (which translates to, “Sound of Last Hope”), Puerto Natales has a frontier energy with a creative edge—think Patagonia meets Pacific Northwest. After days on trail food, it’s a borderline spiritual experience to sit down at Aldea, where they serve guanaco—yes, the very animal you likely shared trail space with. Controversial? Maybe. Culturally authentic? Absolutely. The meat is lean, flavorful, and traditionally prepared with herbs and earthy sauces that do it justice.
For cozy vibes, post-hike pints, and wood-fired comfort food, check out Baguales Brewery, where hikers and locals mingle over IPAs and towering burgers. Got a sweet tooth? Don’t sleep on Café Kaikén—their pastries and artisan coffee feel like a warm hug.
Wander the waterfront, peek into tiny art galleries, or head to the Ether Aike craft market for handmade souvenirs that don’t scream “airport gift shop.” If you’ve got an extra day, the Cueva del Milodón, a massive cave with prehistoric vibes (and a bizarrely lovable giant sloth statue), makes for a quirky but worthwhile side trip.
Punta Arenas: Del Mar (Of The Sea)
If Puerto Natales is the hiker’s town, Punta Arenas is the sailor’s city. Located farther south on the Strait of Magellan, this place feels like it belongs at the end of the world—and honestly, it kind of does. The wind here is not messing around, but neither is the food.
You can dive into local history at the Museo Nao Victoria, where you’ll find full-scale replicas of Magellan’s ships (ideal for feeding that explorer daydream). Then warm up with fresh seafood at La Marmita, a colorful, eclectic restaurant that feels like a fever dream of flavors and global fusions. For something more upscale, Puerto Viejo serves pristine fish straight from the sea, often just hours out of the water.
Also: don’t leave town without visiting the Cementerio Municipal, one of the most hauntingly beautiful cemeteries in South America. Think towering mausoleums, sculpted cypress trees, and stories etched in stone.
Santiago: The Urban Reset You Didn’t Know You Needed
Back in Santiago, everything shifts. It’s vibrant, loud, stylish, and unapologetically modern—exactly what your trail-weary self needs to snap out of your tent-habit mindspace. Stroll through the Barrio Lastarria, a bohemian neighborhood brimming with street musicians, outdoor cafes, and late-night empanadas.
For food, Bocanáriz is a must. This wine-forward spot takes you on a tour of Chile’s vineyards without ever leaving your seat—pairings here are thoughtful and surprising. Want something bold and deeply Chilean? Try Liguria, a spirited bistro full of old-school charm, political posters, and rich stews that stick to your ribs in the best way.
Cap off your night with a cocktail at Siete Negronis, a speakeasy-style bar where mixology feels like performance art. If you’ve got an extra day, ride the funicular up Cerro San Cristóbal for sweeping views of the city, framed by the distant Andes. Sunrise or sunset, it hits different after what you’ve just seen and done.
Whether you’re toasting your trek with pisco or sharing trail stories over sizzling plates of guanaco, the post-O-Trek chapters are every bit as rich as the hike itself. This isn’t just a walk through Patagonia. It’s a journey across landscapes, cultures, flavors—and a version of yourself that only gets uncovered out there.
Gearhead® Kendall’s Loadout
Men’s apparel picks from Rab & Backcountry
Backcountry
Tahoe Sun Short-Sleeve Crew - Men's
5 colors
Rab
Incline Pant - Men's
3 colors
Rab
Mythic G Jacket - Men's
3 colors
Backcountry
Highliner PrimaLoft Air-Perm Fleece Hoodie - Men's
3 colors
Rab
Momentum 9in Short - Men's
2 colors
Rab
Downpour Light Jacket - Men's
4 colors
Gearhead® Mika’s Loadout
Women’s apparel picks from Rab & Backcountry
Backcountry
Highliner PrimaLoft Air-Perm Fleece Hoodie - Women's
4 colors
Rab
Ascendor AS Pant - Women's
1 color
Rab
Mythic G Jacket - Women's
2 colors
Rab
Force Hoodie - Women's
4 colors
Backcountry
Wasatch Ripstop 5in Short - Women's
1 color
Rab
Arc Eco Jacket - Women's
2 colors
Rab
Xenair Alpine Jacket - Women's
2 colors
Check Out Our Rab Mythic G Jacket Gearhead® Field Test
FAQ About The O-Trek & Traveling To Patagonia
1. Do I need to book refugios in advance, or can I just show up?
You absolutely need to book in advance—especially during peak season (Nov–Mar). Spontaneity is great for road trips, not for Torres del Paine. Wild camping isn’t allowed, and campsites/refugios can fill up months ahead. Use the official booking portals (Fantástico Sur + Vertice Patagonia), and lock in your route early.
2. What’s the weather like in Patagonia during fall?
Unpredictable at best. Fall (March–April) brings fiery foliage and fewer crowds, but the weather’s a wildcard. One moment you’re sunbathing on a boulder, the next you're being pelted by sideways sleet. Layer up: think breathable baselayers, insulating midlayers, a bombproof shell, and a puffy for cold mornings and wind-whipped evenings.
3. Can I cook my own food on the trail?
Yes, but only in designated cooking areas at the refugios. Fires and stoves outside these zones? Big no. These shelters usually have running water and sometimes communal stoves, plus the occasional semi-full gas canister left behind by other hikers. Just don’t bank on gourmet—plan simple, efficient, and no-cook lunches for days without midday stops.
4. What boots did you wear, and how did they hold up?
I hiked in the Merrell Moab Speed 2 Mid GTX boots—and they were game changers. Lightweight, waterproof, and supportive on slippery roots and muddy stream crossings. If you're debating between trail runners and boots, go with something waterproof and mid-height. Your ankles and dry socks will thank you.
5. Is there cell service or Wi-Fi on the trail?
Mostly no. You might catch a whisper of signal near Paine Grande or Central, but don't count on it. Some refugios offer paid Wi-Fi (it’s slow and pricey). Download maps, offline translations, and trail info in advance—and let someone know your itinerary before you go off-grid.
6. How physically demanding is the O-Trek?
It’s no walk in the park—but it’s doable with moderate fitness and the right mindset. Expect long mileage days (up to 12+ miles), slick terrain, and big elevation gains (looking at you, John Gardner Pass). That said, the trail is well-marked and maintained. Train your legs, break in your gear, and pace yourself. You’ve got this.
7. Where can I eat real Chilean food after the hike?
Puerto Natales is your post-hike paradise. Aldea serves authentic guanaco, Baguales has burgers and craft beer, and Café Kaikén makes the best pastry-laden coffee breaks. In Santiago, check out Liguria for comfort food and Bocanáriz for wine pairings that might just blow your mind.
8. What wildlife might I see on the trail—and where?
Get ready for the wild side. Guanacos graze near Camp Central and Los Cuernos. Andean condors patrol the skies above Dickson and Gardner Pass. Pumas lurk quietly between Los Cuernos and Central (early morning is your best shot). In the forested backside near Los Perros, keep an eye out for shy huemul deer. Patagonia doesn’t just impress—it watches you back.
Still got questions? Ask a ranger, a refugio staffer, or—better yet—another hiker over instant mashed potatoes and trail gossip. That’s part of the magic.